Wednesday, December 14, 2011

Slow & Steady

OK… Where to start? Firstly I’m only 9 and 3/8 dead (inside). Otherwise the story of my life has become; work, eat, work. There should be a ‘sleep’ in there somewhere, but there’s not, just like there’s no ‘hobby’. I have however bewilderingly managed to finish reading Battle of the Fang by Chris Wraight. Really good book, highly recommend it. FYI – Bjorn has major daddy issues and Magnus the Red is a dick. Also, I picked up The Gildar Rift and have already gotten through the first chapter. It’s piqued my interest, I hope it’s able to keep it.

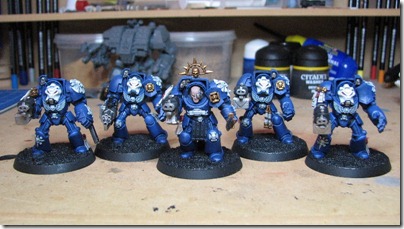
Onto other hobby related topics. I’ve slowly plugged along on the terminators. Five minutes here ten there whenever I can and thusly have managed to get a little further.

IMG_0025 (800x450)

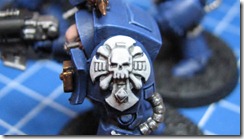
I’ve taken a new approach to painting whites. Rather then build up layer upon layer gradually getting lighter and lighter, I now paint on a basecoat, shade just the recesses with a self made wash and then highlight it. This is by no means new or revolutionary, but I’ve found that it works much better then the traditional way of endless layering.

Srg Crux Terminatus (800x450)   Terminator Shoulder Tabard (800x450)

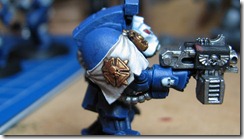
I’ve also tried a new color scheme for the Purity Seal streamers and decretive tabards. With most all of my Space Marines I’ve stuck to the traditional scheme laid out by Games Workshop of Bronzed Flesh, layer Bleached Bone, highlight Skull White, but recently I’ve taken to the dirtier look and wanted to give it a try. I guess this unit has been an experiment of sorts to establish the overall manner in which I’ll paint the army so it’s scheme is cohesive.

Ultramarines Terminator AOBR (800x450)

How To

Purity Seals & Tabards

  1. Basecoat the seal with Scab Red and the streamer with Khemri Borwn
  2. Layer the seal with Blood Red leaving the base color showing in the recesses, layer the streamer with Kommando Khaki.
  3. Highlight the seal with a 1:1 mix Blood Red to Bleached Bone. The streamer was then layered with pure Bleached Bone.
  4. Lastly, highlight the streamer with Skull White.

Aquila & Helmet

  1. Basecoat with Astronomican Grey.
  2. Create a 2:1:1 mix of water, Liquitex Flow Aid and Shadow Grey respectively and wash directly into the recesses.
  3. Layer on a 1:1 mix of Skull White and Astronomican Grey.
  4. Highlight with pure Skull White.

Crux Terminatus

  • This is done in the exact same manner as the Aquila and helmet, but instead of Shadow Grey use Codex Grey.

I guess that’s it for the moment. Have faith… I will complete this army before the apocalypse arrives. This is my word, this is my promise. Cheers!

Monday, October 3, 2011

Plain To Extraordinary

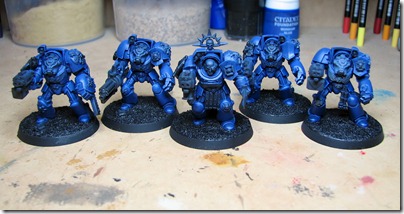
While working on my Ultramarines Terminator squad I felt the models (Assault on Black Reach) where a little too plain compared to my more ornate Assault Terminator squad with Forge World shoulder pauldrons. What’s a hobbyist to do? Rummage through the bitz bin of course.

Since I didn’t need to dress up the Assault Terminators I was left with a plethora of gubbins to use on the standard Terminator squad, plus I got a hold of an assault cannon and a chain fist to help fill out their armament.

2011 10 03 Ultramarine Terminators (2)

In the above picture I’m using a new formula for the paint scheme as well as the zenithal highlighting technique now that I own an airbrush. I’m still employing edge highlighting, but the combination the two I think produce an incredible look. The new method is a lot quicker than what I originally started with and should (I hope) allow me to make quicker progress on the project. Hobby time is precious & rare these days.

  1. Basecoat Mordian Blue
  2. Wash with a 1:1 mix Azurman Blue, Badab Black
  3. Zenithal highlight with Ultramarines Blue
  4. Edge highlight with Ultramarines Blue
  5. On the most pronounced features, edge highlight with a 1:1 mix Ultramarines Blue, Space Wolves Grey.

On another note, Pit of the Oni has joined a new blog network. A fellow blogger and one hell of a painter (Stahly formally of Stahly’s Paint Station) decided to form a small team of exceptional painters and create a new blog as well as a new blog network…

Tale_of_Painters_Network_large

Keep an eye on this one, I have a good feeling about it. Thanks for stopping by. Cheers!
 

Sunday, September 11, 2011

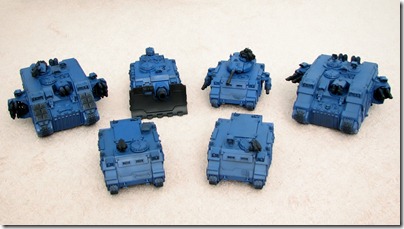
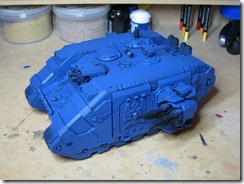
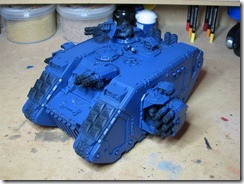
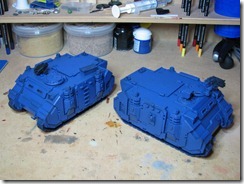
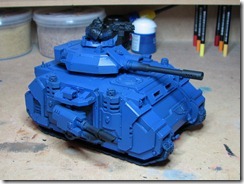
Ultramarines: Tanks Basecoat Finished

I managed to pull myself away from my PS3 long enough to finish airbrushing my Ultramarines tanks and make this blog post, but it’s going to be a short one because time spent blogging is time spent not playing Space Marine.

IMG_3021

Unfortunately I don’t have a ton of useful information to offer with this post.  It’s really more of an update on my progress, but what I have learned thus far in my airbrushing experience is:

  1. Learning distance vs. trigger pull (amount of paint allowed to flow) is key.
  2. Just like using a bristle brush multiple thin coats is still better than one heavy/thick coat.
  3. Moisture traps are a necessity. When the compressor starts to get hot their will be condensation that accumulates in the air hose. If not dealt with it will create splatter spots on the model.
  4. Citadel Foundation paints will clog your airbrush if not thinned properly with Liquitex airbrush medium (or other quick-dry medium) and warrant a little extra effort to clean up the airbrush after using them.
  5. The fluid nozzle does not need to be removed and cleaned after every use.
  6. The airbrush needle is a lot more rugged than what I was initially lead to believe. This may be solely the design of the Grex needle as I have nothing to compare it to.

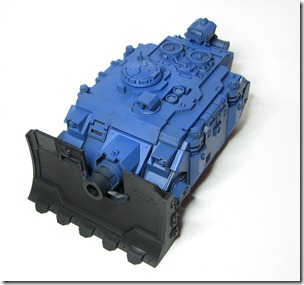
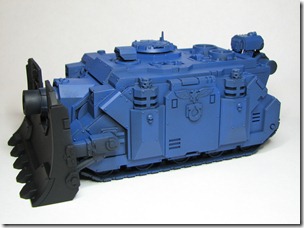
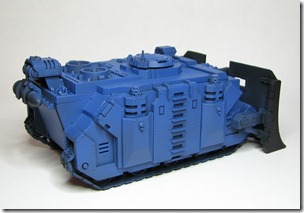
An airbrush is an amazing tool and I regret not buying one sooner.  Next in line are the infantry squads, two tactical squads and a terminator assault squad.  I’d like to note that tanks, especially the Land Raider look infinitely cooler with the Forge World extra armour kit.

IMG_3035 (800x600)

IMG_3038 (800x600)

IMG_3042 (800x601)

IMG_3045 (800x599)

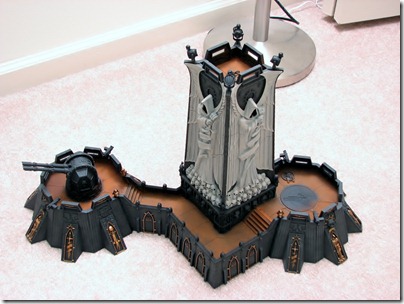
On another note I keep making headway on the Fortress of Redemption (FoR).  I’m not sure I’ve ever mentioned that I’m working on this before now.  The FoR is a superb kit and to say it’s big is an understatement.  This kit is massive.  I bought the kit on its release day and have struggled painting it from day one because of its size, but never the less I chip away at it little by little when I can.  The tower section has undergone three paint jobs before I could get the angel to look how I wanted it and while it’s still not finished I have the foundation correct for where I want to take it.  Tonight I started the floor sections using the MIG Vietnam Earth weathering pigment.

IMG_3033

I’m taking leaps into all kinds of unknown hobby techniques…  airbrushing, weathering pigments.  Where will it end?  So far I’m not enjoying weathering pigments.  They’re incredibly messy and get on absolutely everything.  The amount of time I’ll need to invest in touchups makes me weary to use them often if at all.

So this post ended up being longer than anticipated, but that’s OK, its not like Space Marine has an expiration date on it.  Which reminds me, my milk does expire today so I need to go make a giant glass of chocolate milk.  I’m off to do just that…  Thanks for dropping by and reading.  Cheers!
Tuesday, August 23, 2011

A Brief Detour

Hello everyone! Been a while since I posted on Pit, and thought I would throw some pics of Malifaux up. Still have yet to actually play though.....

First up is a Punk Zombie and a Rotten Belle. The zombie was really just messing around with some paint triads from Reaper Master series. I got to say, finally stepping away from the GW brand was a pleasant surprise. The Belle was an experiment in washes other than Devlan Mud. I was trying to go for a bruised look...not sure if it came out right, but oh well. Looks good enough for me.

The next pic is two more Punk Zombies. Again, messing around with the Reaper paints, trying different ways of doing the swords.

The next mini is Sebastian, Dr. McMorning's faithful assistant. I'm actually proud of this little oddball. I got everything the way I wanted it to look, especially the blood splats.


Next up is the good Dr. McMorning himself. I really wanted to got overboard on the blood for this guy. The one thing I really like about the mini is the shoes. Steel plates scream curb stomp, so I made sure to give a bit of bloody attention on the right foot.

And lastly, my favorite model of the line. The Dark Pimp! The Mad Hatter! Seamus! Some of you may remember I painted another Seamus up a while ago, using earthy tones, and some stripes. This time, I just wanted to try red. Yeah, I'm liking the Reaper red triad to say the least!


That's all I got right now. Still working on the Death Guard. Picked up some FW pieces that I will hopefully paint up soon. Maybe some Oblits on the way.

Hope you enjoyed the minis! Comments/questions welcome as always!

Grendel

Tuesday, August 9, 2011

Down The Airbrushing Rabbit Hole

Last night was my first true leap into the airbrushing rabbit hole as I sprayed an actual model. ‘Oni, in your last post you said you made progress airbrushing terrain, what gives?’ Well, that’s terrain and in my book it doesn’t count because you can fudge it up and it’ll still look nice. Write that down in your notebooks faithful blog readers… Always practice on terrain first. Anyway, here is my Ultramarines Vindicator in a stylish Mordian Blue motif.

Vindicator Basecoat (1)

Not only is this infinitely better than using a standard bristle brush, I found that using the airbrush made it incredibly easy to create natural shadows by simply angling the airbrush and spraying across the model at about a 45 degree angle instead of directly onto it. After just this one use it became apparent why so many love and can’t live without their airbrush.

Vindicator Basecoat (2)

Vindicator Basecoat (3)

Let me start this last segment covering the topic of thinning the paints in an airbrush. Citadel paints absolutely have to be thinned as the paint needs to pass through a fluid nozzle with an orifice literally the size of a pin head. Water alone will not work. Why? Because the paint should dry within micro seconds of hitting the surface. If the paint mixture is watery it will pool up and run. Some people will tell you to use Windex (Yes, the blue stuff used to clean windows.) as it has a quick dry agent in with the overall chemical mix. I tried this and they’re right, it does work. The problem however is that Windex contains ammonium hydroxide. This can cause premature wear on the elastomer seals inside the airbrush. So I do not recommend using Windex. In fact the instruction manual strictly forbids  the use of any ammonia containing products in the airbrush. Here’s your solution for thinning the paint…

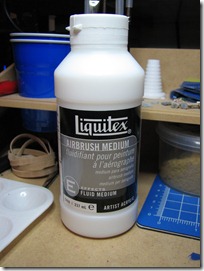
Liquitex Airbrush Medium

Liquitex Airbrush Medium. This stuff works like magic. It’s worth noting that much more is needed when using the Citadel Foundation paints… A lot more. The foundation paints are thick and will clog up the airbrushes fluid nozzle quickly if not properly thinned. As to how much the paint should be thinned; I’m still learning that to be honest.

That’s all for now, I’m off to spray another tank. I’m thinking the Predator is next. Thanks for dropping by. Cheers!


Monday, August 8, 2011

Airbrushing–The New Hotness II

OK, I’ve had plenty of time to test out my new airbrush setup, hell it’s been three weeks since my last post, I should be an expert by now right? No, far from it. The learning curve on this thing is pretty steep. Anyway… My initial thoughts. The airbrush is really nice. The trigger has a nice smooth feel to it, the needle adjustment at the rear works like clockwork and it sprays pretty well; granted I don’t have anything to compare it to. The teardown and reassembly is much like every other airbrush. So what does the Grex Genesis XG have to offer over others? Hell if I know, but the color sure is cool. Seriously though, the price is decent and the quality is apparent, two things that make the purchase worth while for me.

IMG_2958 (640x480)

So what about the compressor? Well, all started out just fine and I was excitedly learning to use my new airbrush when after about 30 minutes… It died. I thought it had overheated as it was very hot to the touch. So I let it set for a day and came back, but the issue still persisted. Thankfully BLICK (where I bought it) has some superbly awesome customer service. After explaining my issue they had a new one sent out the following day and I didn’t have to pay shipping to return the defunct one. Once I got the new compressor I was back in action. At this point I’m not convinced that spending the extra money on a tank is warranted. I’m able to spray just fine with static pressure without issue. It’s not until I go wide open throttle with the trigger that I notice the pulsation piston style compressors are prone to, but if I’m spraying that much paint does it matter?

IMG_2954

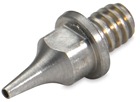
After spraying away and making huge strides completing some terrain pieces. I decided I should give it a good clean. Wouldn’t you know it, bad luck strikes again. During reassembly I broke the damn fluid nozzle. Now I distinctly recall someone somewhere on the intarwebz telling me I should buy a spare because I will brake it. How silly of me to think that I wouldn’t fall into that percentage of newbies. Yet another order to BLICK… and damn is that little thing expensive.

XGFluidNozzle

Overall I’m pleased with this setup and I plan on purchasing the Grex Genesis XA for those bigger projects that don’t require any precision.

Well I’m going to get to spraying some tanks. Thanks for stopping. Cheers!
Saturday, July 16, 2011

Airbrushing–The New Hotness

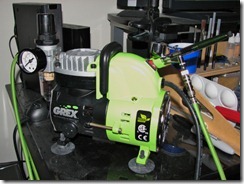
While airbrushes and the art of airbrushing have been around for a very long time and have even been in modeling for quite awhile they have only broken into the Games Workshop hobby in recent years.  Airbrushing is the new hotness.  So much so that Games Workshop themselves have jumped on the bandwagon with their Citadel spray gun.  A modest yet useful tool when laying down a basecoat or wash.  I have myself jumped on the airbrush bandwagon.  Procuring a double action, gravity fed airbrush, a portable compressor and a few accessories.

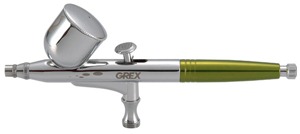
First up, the airbrush.  After quite a bit of research I decided on a Grex Genesis XG airbrush.  I chose this brand because their products looked rather decent, the price was acceptable and what reviews I could find were all positive.  I had considered an Iwata (specifically the HP-C Plus) because they’re the industry standard, but I couldn’t bring myself to pay extra just for the name.

GrexXG

The compressor is again Grex brand.  I’m keeping it all in the family.  It’s a simple 1/8 HP Oil-less piston compressor.  All of the model airbrushing aficionados have strong, unyielding opinions on these things.  What it should come with, what power rating it should have, what PSI level it can maintain and what accessories should be used with it.  Well, I chose the Grex because again the price was right and it comes standard with all of the accessories these guys say should be purchased in addition to.  This bad boy comes with an integral moisture trap, pressure gauge, pressure regulating valve and auto shut-off.

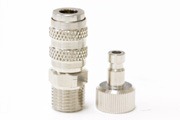
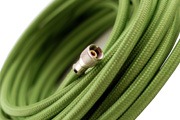
The two accessories I got for my new setup are the quick connector to easily disconnect the airbrush from the compressor to better refill the paint cup and a six foot braided air hose as the plastic coiled one that comes with the compressor will place unwanted resistance on movement and can easily become kinked.

GrexQuickConnectGrexHose

Tomorrow I’m going to jump right into using this thing and let you know how it goes and what I think of this airbrushing setup.  Thanks for stopping by and be sure to check back for the results.  Cheers!
 

Monday, May 2, 2011

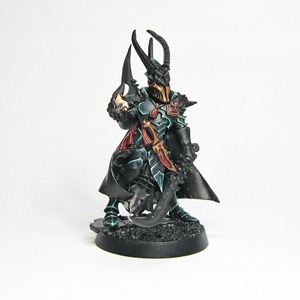
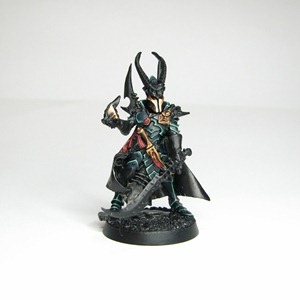
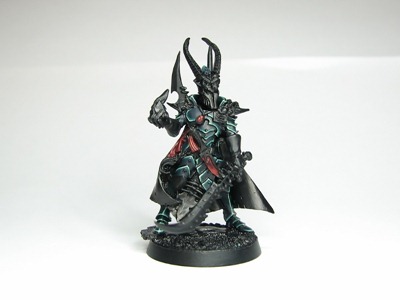
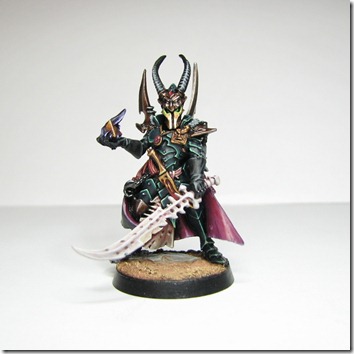
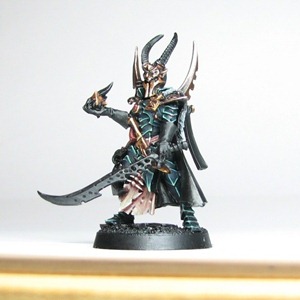
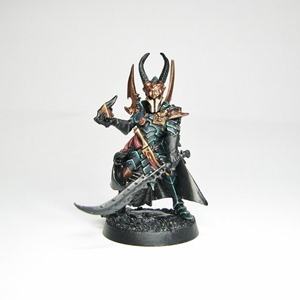
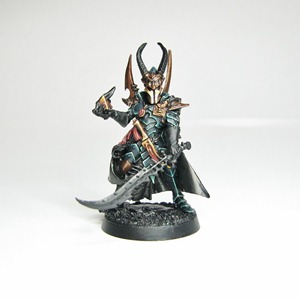
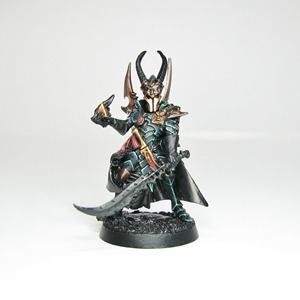
Dark Eldar Archon–The Finish

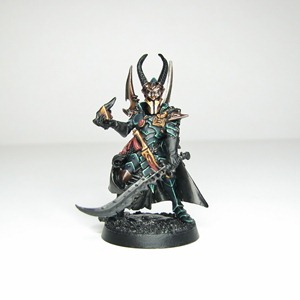
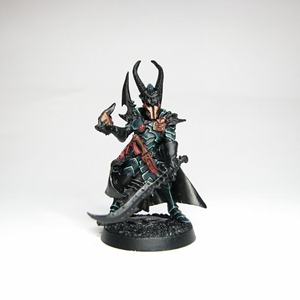
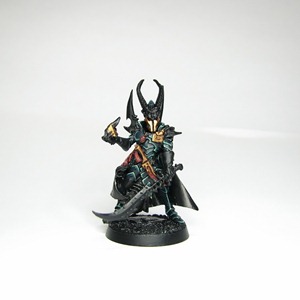
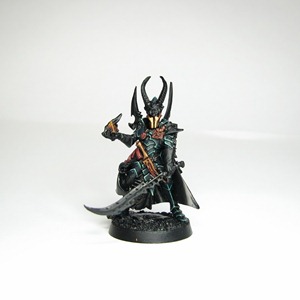
Thanks again to all those who have followed this project.  This is the closing chapter, the model is completed and has been passed on to its rightful owner.  If you read the first post to this project you’d know that I painted this as gift; to show my appreciation.  Without further rambling, I present the finished Dark Eldar Archon…

Archon - Final (1)

Archon - Final (3)

Archon - Final (5)

Archon - Final (4)

Archon - Final (2)

There are lots of step in between my last post on this project to the finished state, but for me to keep the finished model somewhat veiled until I could gift it away, this needed to happen.  Follow the jump for step-by-step tutorials of the completing stages.

As always, thanks for stopping by.  Stay tuned for what’s in the pipes as I’ll have some reviews of a great product line that recently made its way to the USA.  Cheers!

Sunday, April 17, 2011

Dark Eldar Archon-Flayed Skin

Just another update on the Dark Eldar Archon.  I finished the flayed skin and fur pelt on his back.  Sadly, I couldn’t stop and take step-by-step photos for this one as wet blending doesn’t really allow for it, but the steps are typed out for you below the picture.

Archon Flayed Skin Final

Step 1.  I started by basecoating the flayed skin with Tallarn Flesh.

Step 2.  The flayed skin was shaded with a 1:1 mix of Dark Flesh and Liche Purple that was thinned and applied into the recesses.

Step 3.  The whole area was washed with Ogryn Flesh.

Step 4.  I then highlighted the flayed skin with thinned Rotting Flesh.

Step 5.  The flayed skin was highlighted again with a 1:1 mix Rotting Flesh and Skull White.

Step 6.  Further highlighting was done by adding more Skull White to the previous mix.  Approximately 2:1 Skull White to Rotting Flesh.

Step 7.  Lastly some edge highlighting was done by adding in more Skull White to the previous mix.  Approximately 3:1 Skull White to Rotting Flesh.


Thursday, April 14, 2011

Dark Eldar Archon-Bronze Step-by-Step

The title pretty much says it all.  I’m really pleased with how this model is coming along I may even end up mounting him on a plinth.  On to the tutorial…


Archon Bronze Stage1

Step 1.  The bronze details were first basecoated with a 1:1:1 mix of Tin Bitz, Dwarf Bronze, and Scortched Brown.

Archon Bronze Stage2

Step 2.  A second basecoat was applied using a 1:1 mix of Tin Bitz and Dwarf Bronze.

Archon Bronze Stage3

Step 3.  A 2:1 mix of Devlan Mud and Chaos Black was carefully applied into the recesses and joints of all the bronze details.

Archon Bronze Stage4

Step 4.  The raised areas, spikes and edges were highlighted with a 1:1:1 mix of Tin Bitz, Dwarf Bronze and Mithril Silver.

Archon Bronze Stage5

Step 5. A fine edge highlight of pure Mithril Silver was then applied to only the most prominent features and tips.  The bladed edge of the spikes then got a wash of the 1:1 mix Devlan Mud and Chaos Black and were finished off by taking the mix from step 4, thinning it heavily and glazing it over the washed edge.

Disclaimer: If you choose to apply this tutorial and/or the last one covering the gold details to your new Tomb Kings army… You will never finish painting your models.  ;)


Saturday, April 9, 2011

Dark Eldar Archon-Gold's

As promised I’m back with another step-by-step painting tutorial with photos.  This time around I’m doing the gold bits of the Archon.


Archon Gold Stage1

Step 1.  The gold bits were base coated with a 1:1 mix of Scorched Brown and Shining Gold.

Archon Gold Stage2

Step 2.  They were then layered with Shining Gold to bring up the color.

Archon Gold Stage3

Step 3.  Shading was done with a 2:1 mix of Ogryn Flesh and Leviathan Purple.  This mix was applied to the recesses and parts where shadows would form.

Archon Gold Stage4

Step 4.  To further shade the gold Devlan Mud was washed into the recesses.

Archon Gold Final

Step 5 & 6.  The edges were highlighted with a 1:1 mix of Burnished Gold and Shining Gold followed by an edge highlight of pure Mithril Silver.  These two steps are combined because sometimes it’s necessary to go back with the gold mix and ‘glaze’ it onto the extreme highlights to tone them down a bit.

Next up I’ll be tackling the brass details of the shoulder guards, knee pad and helm so stay tuned and as always, thanks for stopping by.  Cheers!
Monday, April 4, 2011

Dark Eldar Archon-Reds

Hi all, just a small update on the Archon.  I didn’t bother to stop and take step-by-step photos on this one because there just isn’t that much to cover.


Archon Reds Final

Step 1.  Lay down a base coat of Mechrite Red.

Step 2.  Build up the colour with Blood Red.

Step 3.  Apply a wash of Devlan Mud directly into the recesses.

Step 4.  Highlight with thinned Blazing Orange.

Step 5.  Edge highlight with Vomit Brown.

Step 6.  Wash with Baal Red.


The next update will be a step-by-step with photos of the metals so check back soon.  Thanks for stopping.  Cheers!
Wednesday, March 23, 2011

Dark Eldar Archon–Armour Step-by-Step

Wow… I need a drink… OK, Now that I have my Rum & Coke I can type out this post of paint mixing followed by more paint mixing and finish it off with completely absurd paint mixing.  So on with it then…

Step 1.  After priming the model Chaos Black I laid down the base coat of the armour using a 2:1:1 mix of Enchanted Blue, Dark Angels Green and Chaos Black.

Archon Armour Stage1

Step 2.  Thinned Chaos Black was painted into the recesses of the armour and between overlapping armour plates.

Archon Armour Stage2

Step 3.  Edge highlight the armour plates using a 2:1 mix Enchanted Blue and Dark Angels Green.

Archon Armour Stage3

Step 4.  Also what I call completely absurd paint mixture step.  Build up the edge highlighting on the armour with a 6:2:1:1 mix of Rotting Flesh, Enchanted Blue, Dark Angels Green and Scorpion Green

Archon Armour Stage4

Step 5.  The last and the easiest step.  Highlight the sharpest edges of the armour plates with straight Rotting Flesh.

Archon Armour Final

That’s all folks.  I’m going to go finish my Rum & Coke and relax for the rest of the night.  Thanks for stopping.  Cheers!
Recommended Posts

Blog Widget by LinkWithin